Updated: 12/9/18 to reflect the latest App Store Connect changes
We have submitted lots of apps to the iOS App Store over the years, and we’ve helped a lot of startups submit theirs.
While we work as a virtual tech team for many startups, we believe that every business should retain control of their own tech.
We’ve put together a basic beginner’s guide to testing your app, running your private beta in TestFlight and launching your app publicly into the App Store. We initially created this guide for our clients but we’ve decided to share it here as it will be incredibly useful to anyone working with third party development teams.
While we recommend that you work closely with someone who has experience releasing apps through the App Store, this guide should give you a good overview of what to expect and what to consider…
App Store Connect
You will need an App Store Connect account to submit and manage your app in the App Store. To get an App Store Connect account, you will first need to enrol in the Apple Developer Program. There are three types of developer accounts; individual, organisation and enterprise.
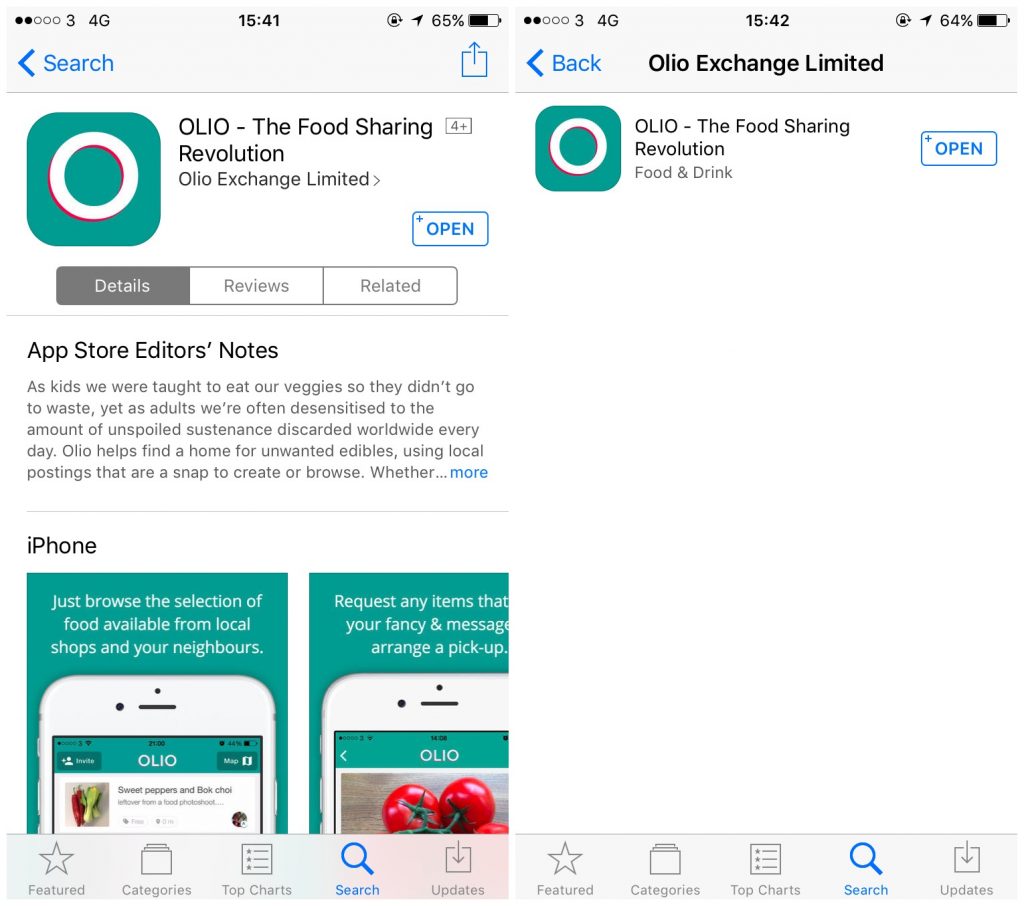
Individual and organisation accounts both cost $99 / year. If you enrol as an individual, your personal name will appear as the app’s developer and you won’t be able to easily collaborate with other developers. If you enrol as an organisation, your company name will be listed. In the following screenshots, you can see the developer of OLIO is listed as Olio Exchange Limited. If you click on that name, you will see all apps created by that developer.
If you go organisation, you’ll need to provide your company’s D-U-N-S number. It can take up to 30 days to get this so make sure you do it sooner rather than later.
It is possible to assign an app to a different developer in the future, but it is much more efficient, in our experience, if each product owner owns their app and gives and revokes access to those who need it and those who don’t as necessary.
TestFlight
TestFlight is an official Apple service that allows developers to install and test iOS apps before making them available to the public.
Uploading a beta version of your app to TestFlight allows you to invite people you want to see your app to test it. When you have uploaded your app to TestFlight, you are not obliged to put your app into the App Store.
There are two levels of user testing in TestFlight.
Internal testing
When you submit an app for internal testing, you can add up to 25 internal testers to play around with a version of the app at any point in the development process.
In our experience, this access is given to all necessary stakeholders who don’t have access to the development environment and want to play around with the app on their phones. Internal testers are invited via email so they don’t have to rely on a developer manually installing each build on each device, making it possible to add testers remotely.
Apps submitted for internal testing in TestFlight do not need to be approved by Apple and you can submit as many builds as you like.
Most apps will (should) go through several rounds of internal testing to find bugs and optimise user experience before a wider group of people are given access…
External testing
Once you are ready to give access to trusted ‘closed-beta’ users, you can submit your app for external testing. At this point, your app will need to comply with the App Store review guidelines (some of this is covered below).
You will be required to prove that you have terms and conditions, a privacy policy and support contact details (e.g. a mailto link to you/your support team) in place. We recommend doing this with a very basic landing page, linking off to relevant content.
You are able to add up to 2,000 external testers in TestFlight but there are several things to consider:
- We recommend adding a handful of testers at a time (starting with as few as 5 or 10 very trusted and close people), before gradually increasing the user base so you are in touch (ideally directly) with all your testers so you can stay on top of feedback
- Testers will need to download and install the TestFlight app first, and then download the latest version of your app to test via TestFlight. The email apple sends out with the testing link has good instructions on the process, but it is very important to make sure that your testers know exactly what to expect so that they can take the necessary steps.
Using the feedback from your first small test group, we recommend iterating on your app where necessary, resubmitting and opening to a wider group of testers. With a steady pace and careful iterations, you will be able to create an easy-to-use, loveable app suited to your audience before you publicly launch on the App Store…
Public submission
When you submit your app to the App Store, you will have the option to hold the app back for developer release, so you can manually release your app when you are ready. This is done at the time of public submission.
You are not required to use TestFlight to submit your app for public release, although we highly recommend doing some form of extensive user testing before submitting your app to the App Store.
Creating a new release is relatively simple in App Store Connect, and if you have used TestFlight, you will have already played around with simplified submission forms.
Once submitted, your app will be tested by a real-life human-being working for Apple. In our experience, app approval can be subjective as each tester may interpret Apple’s strict and extensive guidelines slightly differently. App review times fluctuate frequently but an average can be found here.
App Store optimisation
While the form you are required to fill in to submit your app is relatively simple, it’s really up to you to get the most out of the App Store. There are millions of apps in the App Store, with more being added every minute. You can find all of Apple’s guidelines on app properties here, but how do you make yours stand out?
Title
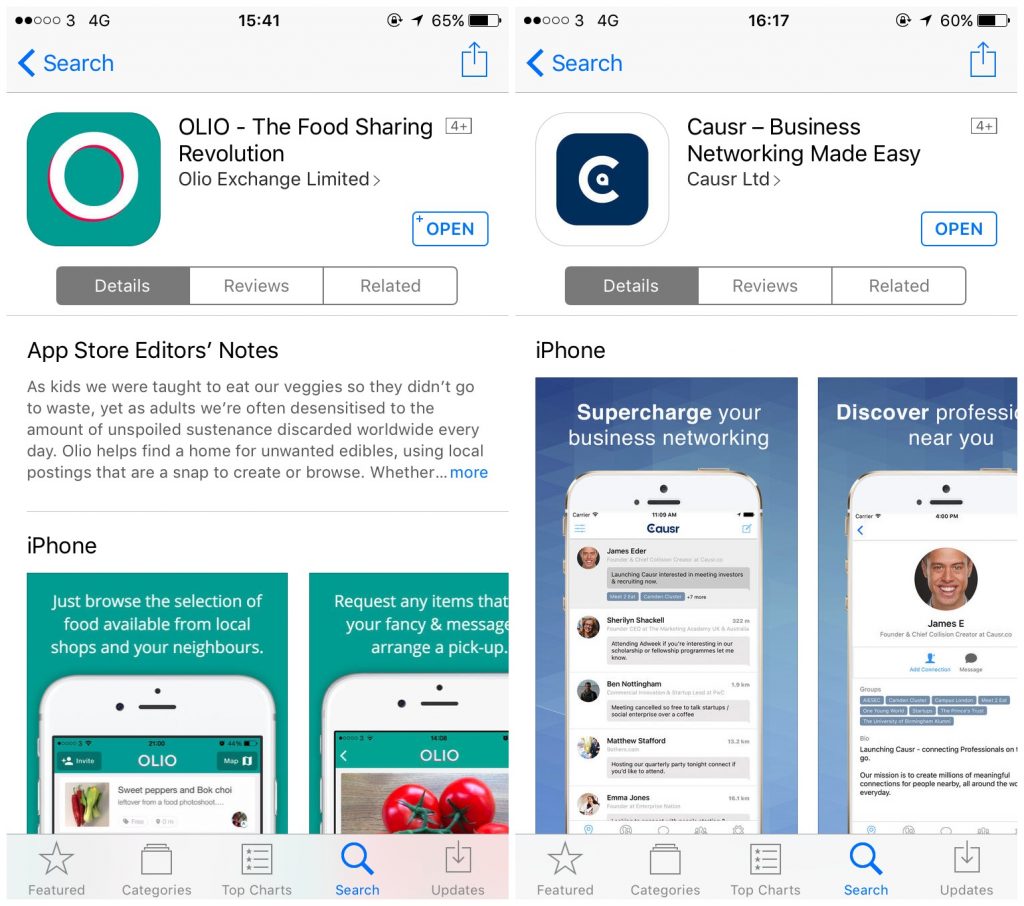
Unless someone is looking explicitly for your app, they’re likely going to search keywords. OLIO know that if people don’t know the name of the app, they will likely search for ‘food sharing’. The Causr team know that people will be looking for ‘business networking’ or simply ‘networking’.
Robi Ganguly, CEO of Apptentive, warns that you’ll want to:
“spend time researching which keyword that is, because changing your title often to include different keywords can be detrimental. As your app begins to rank higher and gain more reviews, news of your app will begin to spread by word of mouth. Changing the title can make it difficult for word to spread about your app.”
Apple does advise against using descriptions within your app name and limits app names to 50 characters.
As Sylvain Gauchet from Apptamin says in her blog post App Store Optimization (ASO): App Name And Keywords:
“We’ve never recommended keyword stuffing in your app name, but we’ve always advised to be descriptive and try to get some main keywords in your app name while keeping it user friendly. As you can see, that’s not really the direction that Apple wants you to take… As we don’t know yet how much Apple will enforce that new limitation, you should still try to find a good balance between keywords and branding (in 50 characters).”
Keywords
The App Store has a 100 character limit for keywords which determine which search strings your app will show up for. Again, you will want to have well researched your keywords to make sure you’re showing up in the right searches.
Images
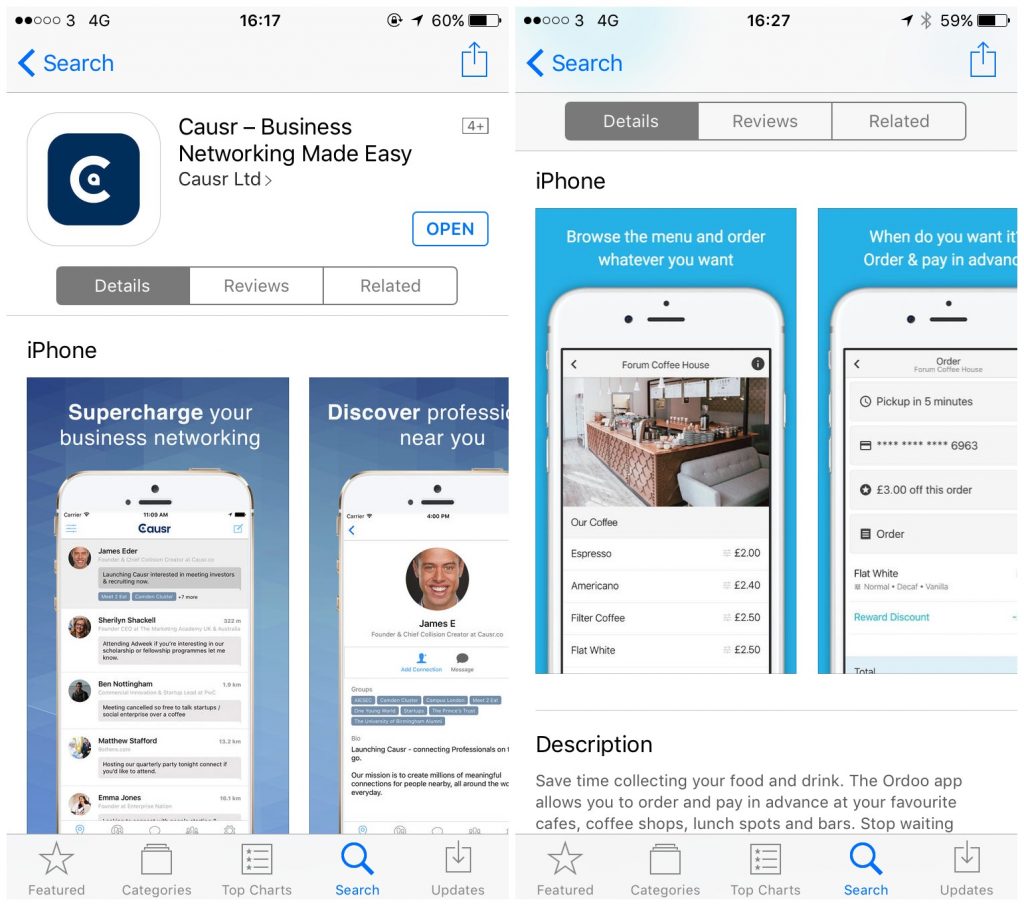
You will be required to upload some images of your app when you submit it and these will be used in the App Store so people can learn more about your app before they download it. This is the perfect opportunity to show what your app is and how it works and these images will help anyone who sees your app decide whether to download it, go to one of your competitors or just leave it.
You can submit one set of screenshots and one optional app preview per device family, and they will be used across device sizes and localizations, or App Store Connect’s Media Manager will help you create device specific screenshots if the app’s UI or behaviour changes based on the device size.
You may want to add inspirational and explanatory text to your images to show what the app can do and how it works, and/or display your screenshots in an iPhone/ iPad container to add context.
Check out this blog post by Melanie Haselmayr, CEO and founder of Mevvy, for Smashing Magazine on App Store screenshot optimisation and find loads of inspiration in this blog post by Dan Counsell, Product Designer and Founder of Realmac Software.
Find out more about App Store optimization at Optimizely and the App Store for Developers.
Risks/considerations
As your app will be tested by a human being working for Apple, there are risks around the subjectivity of Apple’s acceptance guidelines. When we submitted an adult-themed app to the App Store, it was rejected several times on the grounds of the nature of the content, even though many (many) apps with similar and (in our opinion obscene) content were readily available for download.
Another major consideration is location. If your app only works in the UK, a US based tester may not be able to get it to work. If your app requires a user to be within range of an item or place, it is impossible to tell if the tester will be able to try it.
We’ve experienced issues in the past with an app that relied solely on LinkedIn authentication due to location security issues, and recommend having two forms of user authentication where possible in case the tester runs into an issue with one. This will also prevent a single point of failure for the app when it gets into users’ hands.
If you are unable to explain why you are using social or Google authentication (e.g. to pull in images and data from those accounts), don’t expect your app to be accepted. We did get the app that required LinkedIn authentication accepted, but we had to work closely with, and jump through a few hoops for, our App Store Connect tester. Which leads us nicely on to…
The best way to mitigate these risks is to submit your app for approval as early as possible. Remember, Apple want your app in the App Store, they’re on your side, and once you’ve connected with an App Store Connect tester, you’ll be able to discuss your options for getting your app accepted person to person.
It’s impossible to say how long an app will take to get into the App Store. While working with experienced developers can certainly help you be realistic in your expectations, we always recommend that clients don’t set a solid launch date until the app is accepted and ready to go.
If you’d like to discuss your startup or project, get in touch with Simpleweb today.